 |
| Snowman! |
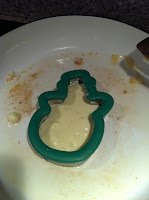
My kids are always after me to make them pancakes that are shaped like certain things. Around Christmas, after doing my usual "Mickey Mouse" or bear and even managing a heart for my daughter a few times, I had the idea of using my large Wilton cookie cutters to make the shaped pancakes. This worked like a charm. At Christmas time, we had gingerbread man pancakes and this morning we enjoyed snowmen. This is the cookie cutter I used for my snowmen:
These cookie cutters work great for this! We also have this same brand of gingerbread man cutter and I will eventually add some other shapes to my collection. The size is a little larger than a standard cookie cutter, which works out well for a pancake mold. You could try other cookie cutters as well, but make sure they are metal as you wouldn't want to melt a plastic one in your pan! So, I'll share my homemade pancake recipe and then give you the step-by-step instructions for making your own shaped pancakes.
Homemade Cookie Cutter Pancakes
Ingredients:
2 cups all-purpose flour4 teaspoons baking powder
1/2 teaspoon salt
2 cups milk
2 beaten eggs
4 tablespoons oil (olive or coconut)
Other items needed: shortening (I use Spectrum Organic Shortening -- 24 oz
Directions:
- This is very important! Start heating your pan so it can warm up while you make the pancake batter. The first batch won't turn out well if your pan isn't hot enough. So, put a spoon of shortening in the pan and set your burner to medium-low. I like to cook mine in my enamel-coated skillet.
- Mix all dry ingredients in a medium bowl.
- Beat eggs together in a small bowl and then add in milk and oil.
- Make a well in the center of the dry ingredients and pour in the liquid ingredients.
- Mix well!
- Grease the inside edges of the metal cookie cutter. Don't be stingy with the shortening! Your pancake will stick if you don't have enough. Now you're ready to start cooking!
- Lay the greased cookie cutter in the middle of the pan.
- Scoop up some batter and pour it into the cookie cutter, making sure it spreads to all edges.
- Allow the pancake to cook until small bubbles start to form on the top.
- Using a potholder, gently lift the cookie cutter from the pancake. If you used enough shortening, it should come right off.
- Flip your pancake and allow it to finish cooking.
- Trim any edges off that spread out after you flip it.
- Decorate, add pure maple syrup and enjoy!


This recipe makes plenty of pancakes for our family of 5 to have for breakfast alone. It gives the small children 2 each and 4 each for my husband and I.


0 comments:
Post a Comment